Are you interested in creating unique and beautiful glazed pottery but don’t have access to a kiln? Don’t worry, kiln-free pottery glazing is possible with alternative methods and techniques.
In this section, we will provide a step-by-step guide on how to glaze pottery without a kiln. We will explore different techniques and materials that you can use to achieve professional-looking results from the comfort of your own home.
Whether you are a beginner or an experienced pottery enthusiast, this guide will provide valuable insights and tips to help you create stunning glazed pottery without a kiln.
Key Takeaways:
- Kiln-free pottery glazing is possible with alternative methods and techniques.
- This section will provide a step-by-step guide on how to glaze pottery without a kiln.
- Explore different techniques and materials to achieve professional-looking results from home.
Understanding Pottery Glazing Techniques
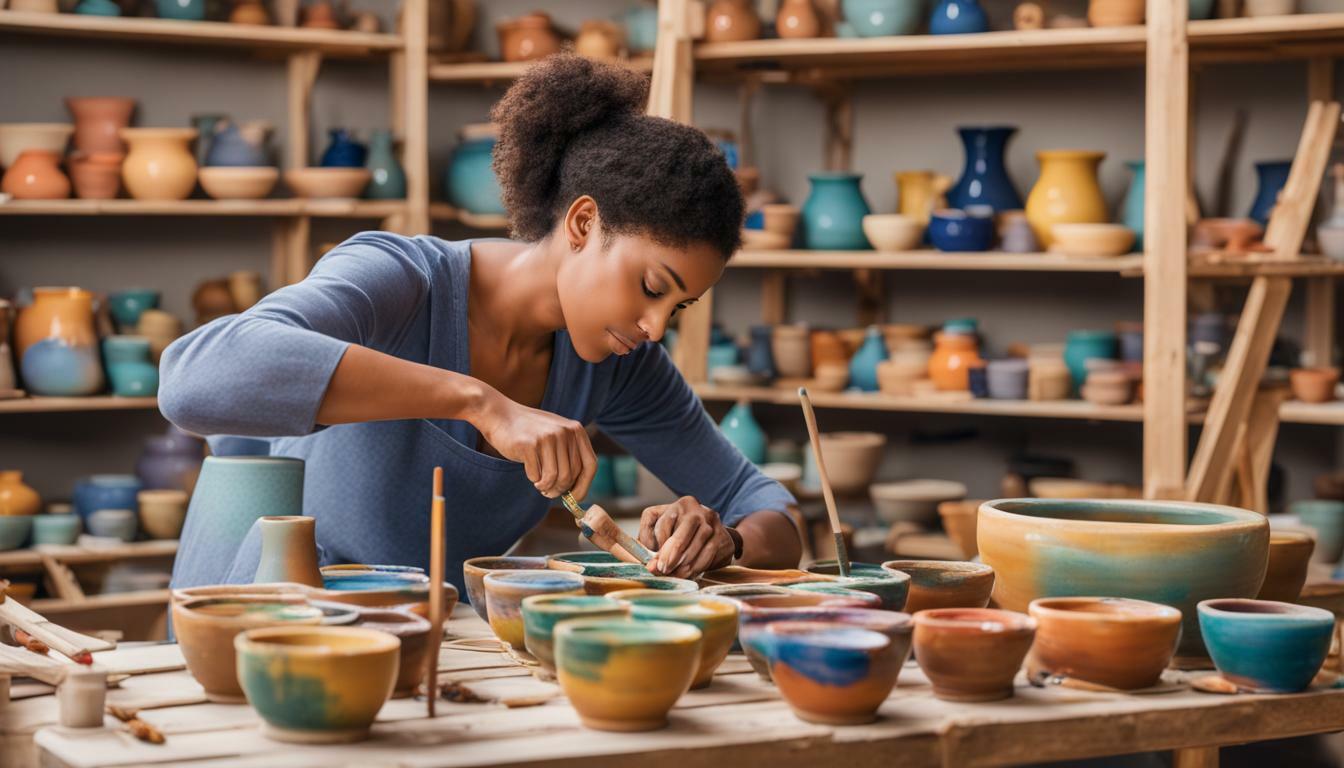
If you’re looking to try your hand at pottery glazing without a kiln, there are a variety of techniques you can explore. DIY pottery glazing is not only cost-effective, but it also allows for more creativity and experimentation. Below, we will discuss some pottery glazing techniques that don’t require a kiln, along with some pottery glaze alternatives.
DIY Pottery Glazing Techniques
One popular DIY method for pottery glazing is using simple materials such as baking soda, white vinegar, and corn starch. Simply mix the baking soda and corn starch in a pot of boiling water, add in the white vinegar, and stir until it thickens. Once the mixture has cooled down, you can apply it to your pottery with a brush. This glaze will dry hard and glossy, and can be fired in an oven at 300°F for around 30 minutes.
Another DIY option is using a mixture of glue and food coloring. Mix together equal parts of white glue and water, then add a few drops of food coloring until you achieve your desired color. This mixture can be applied to your pottery and left to dry overnight. Once it has dried, your pottery can be sealed with a clear acrylic spray to protect it.
Pottery Glaze Alternatives
If you don’t want to venture into DIY territory, there are also alternative pottery glazes available that don’t require a kiln. One option is to use acrylic paint, which can be applied directly to your pottery and left to dry. Once it has dried, you can seal the paint with a clear glaze for added protection.
Another alternative option is to use a glaze pen, which is essentially a paint pen filled with glaze. These pens allow for precise application and are a great option for adding details and designs to your pottery.
Exploring these pottery glazing techniques and alternatives can open up a whole new world of creativity and experimentation. Don’t be afraid to try different methods and mix and match materials to achieve different effects.
Oven-Baked Pottery Glazing
If you don’t have access to a kiln, you can still achieve beautiful glazed pottery by using your oven at home. Here are the steps to follow for successful oven-baked pottery glazing:
- Preheat your oven to the temperature recommended by the manufacturer of your chosen glaze. This temperature can vary depending on the type of glaze you are using, so be sure to check the instructions carefully.
- Apply the glaze to your pottery using a brush, sponge, or other applicator. Be sure to apply an even layer of glaze, taking care to cover all areas of your piece.
- Allow the glaze to dry completely before placing the pottery in the oven. This can take anywhere from a few hours to a full day, depending on the thickness of the glaze and the humidity level in your workspace.
- Once the glaze is dry, place your pottery on a baking sheet and carefully place it in the preheated oven.
- Bake your pottery according to the recommended time and temperature for your glaze. This can range anywhere from 30 minutes to a few hours, so be sure to set aside enough time for the process.
- After the recommended baking time, turn off the oven and allow it to cool down completely before removing your pottery. This will help prevent cracking or other damage to your piece.
- Once the oven has cooled down, carefully remove your pottery and inspect it for any imperfections or inconsistencies. You may need to touch up certain areas with additional glaze and repeat the baking process.
With a little patience and practice, you can achieve beautiful pottery glaze results right in the comfort of your own home. Experiment with different glazes and techniques to find the perfect combination for your pottery creations.
Kiln-Free Pottery Glazing Techniques
Glazing pottery can be a tricky process, especially if you don’t have access to a traditional kiln. Fortunately, there are alternative pottery glaze firing techniques that can achieve beautiful results without the need for a kiln. Here are some popular kiln-free pottery glazing options:
Raku Firing
Raku firing is a Japanese pottery technique that involves removing the pottery from the kiln at high temperatures and quickly cooling it down in sawdust or other combustible materials. This process creates unique and unpredictable glaze effects that cannot be achieved through traditional firing methods.
To raku fire, you will need a propane torch, a raku kiln (or a homemade alternative), tongs, and a combustible material like sawdust. Once the pottery is fired, remove it from the kiln and place it in the sawdust. The sawdust will catch fire and create a reduction atmosphere, which interacts with the glaze to create unique patterns.
Pit Firing
Pit firing is another ancient technique that involves placing the pottery in a hole in the ground and surrounding it with combustible materials like sawdust, leaves, and wood. The pottery is then fired by lighting the materials on fire, and the final result is dependent on the length and intensity of the firing process.
To pit fire, dig a hole in the ground and place the pottery inside. Surround it with sawdust and other combustibles, and light the fire. As the fire burns down, the pottery will heat up and the glaze will start to melt. After the fire has burned out and the pottery has cooled, remove it from the hole and clean it off.
As you experiment with these and other kiln-free pottery glazing techniques, keep in mind that the results can be unpredictable and may vary from firing to firing. However, with practice and patience, you can achieve unique and stunning glaze effects that are truly one-of-a-kind.
Materials and Tools for No-Kiln Pottery Glazing
Glazing pottery without a kiln requires a few alternative materials and tools. While some items may be found in your home, others may need to be purchased at a craft store or online. Here are some pottery glaze alternatives and tools that you will need:
Alternative Pottery Glazes:
| Glaze Type | Description |
|---|---|
| Salt Glaze | Produces a unique textured finish; requires salt, a fireproof container, and a gas grill or other heat source. |
| Soda Glaze | Creates a textured and glossy finish; requires soda ash, a fireproof container, and a gas grill or other heat source. |
| Raku Glaze | Provides an earthy, metallic finish; involves removing pottery from a hot kiln and transferring to a container with combustible materials for smoking. |
Tools:
- Paintbrushes and/or sponges for applying glaze
- A palette knife or similar tool for mixing glazes
- A gas grill or other heat source for alternative firing methods
- Fireproof containers such as metal garbage cans or large flower pots
- Protective gear such as heat-resistant gloves and a respirator mask
With these alternative pottery glaze options and tools, you can experiment with different glazing techniques and achieve beautiful results without a kiln.
Step-by-Step Guide to Glazing Pottery Without a Kiln
Glazing pottery without a kiln may seem like a daunting task, but it can be accomplished with the right techniques and materials. Follow these easy steps to create beautifully glazed pottery from the comfort of your own home.
Step 1: Prepare Your Pottery
Before beginning the glazing process, ensure that your pottery is clean and dry. Any dirt or moisture on the pottery can negatively affect the glaze application. If your pottery has any cracks or chips, be sure to repair them before proceeding.
Step 2: Apply the Glaze
There are a variety of glaze application techniques to choose from, including brushing, spraying, and dipping. Select the technique that works best for you and apply the glaze in thin, even coats. Allow each coat to dry completely before applying the next. Depending on the type of glaze you’re using, you may need to apply multiple coats for the desired effect.
Step 3: Bake Your Pottery
Using an oven is a common alternative to a kiln for pottery glazing. Preheat your oven to the temperature recommended by your glaze manufacturer and place your glazed pottery inside. Bake the pottery for the recommended amount of time, ensuring that the temperature remains consistent throughout the baking process. Once the baking is complete, allow your pottery to cool completely before handling it.
Step 4: Finishing Touches
After the baking process is complete and your pottery has cooled, you can add any finishing touches. This may include adding additional glaze or applying a clear coat to protect the glaze. Be sure to handle your pottery with care to avoid any damage to the glaze.
With these simple steps, you can successfully glaze your pottery without a kiln. Experiment with different techniques and glaze options to create unique and beautiful pieces of art.
Tips and Tricks for Successful Kiln-Free Pottery Glazing
Glazing pottery without a kiln may seem daunting, but with the right techniques and materials, it can be a rewarding and enjoyable experience. Here are some valuable tips and tricks to help you achieve professional-looking results:
- Experiment with alternative pottery glaze options: Kiln-free pottery glazing offers a world of creative possibilities, so don’t be afraid to try out different materials such as acrylic paints or even food coloring for unique effects.
- Use underglazes for more vibrant colors: Underglazes are specially formulated to produce brighter, more intense colors when fired at a lower temperature. They are a great alternative to traditional glazes and can be used in combination with other materials.
- Apply glaze in thin layers: It may be tempting to apply thick layers of glaze to achieve a desired effect, but this can cause cracking and uneven application. Instead, apply thin, even layers and build up the desired effect gradually.
- Don’t skip the bisque firing: Bisque firing your pottery before glazing is crucial for removing any moisture and ensuring that the glaze adheres properly to the surface. Skipping this step can result in the glaze flaking off or peeling away.
- Protect your oven and kitchen: Oven-baked pottery glazing can release fumes that may be harmful if inhaled. Ensure that your oven is well-ventilated and consider covering the bottom with foil or a baking sheet to protect it from any drips or spills.
- Consider alternative firing methods: Kiln-free pottery glazing opens up the possibility of alternative firing methods such as raku or pit firing. Research these methods and experiment with different techniques to achieve unique and beautiful results.
Conclusion
Glazing pottery without a kiln may seem like a daunting task, but with the right techniques and materials, it can be achieved with professional-looking results. By following our step-by-step guide and experimenting with different kiln-free methods, you can create stunning glazed pottery right at home.
Remember, understanding pottery glazing techniques and alternative pottery glaze options are key to successful kiln-free pottery glazing. Be sure to explore oven-baked pottery glazing and kiln-free pottery glazing techniques such as raku and pit firing for unique glaze effects.
When it comes to materials and tools, there are alternative pottery glaze options available that can produce beautiful results. Don’t be afraid to experiment and try new things.
Tips and Tricks for Successful Kiln-Free Pottery Glazing
Here are some valuable tips and tricks to keep in mind when glazing pottery without a kiln:
- Make sure your pottery is fully dry before applying glaze to avoid cracking or peeling.
- Use gloves when handling glaze, especially if using toxic materials.
- Experiment with layering different glazes to create unique effects.
- Practice patience, as some alternative glaze firing techniques can take longer than traditional methods.
- Take safety precautions when using an oven for pottery glazing, such as using a well-ventilated area and avoiding food contact.
Overall, enjoy the process of glazing pottery without a kiln and let your creativity shine. With a little practice and experimentation, you can achieve beautiful glaze results right at home.
FAQ
Q: Can I glaze pottery without a kiln?
A: Yes, it is possible to glaze pottery without a kiln. There are alternative methods and techniques that can be used to achieve beautiful glaze results at home.
Q: What are some pottery glazing techniques that can be used without a kiln?
A: DIY methods and alternative pottery glaze options can be utilized without a kiln. These techniques allow for creativity and experimentation.
Q: How can I oven-bake pottery for glazing?
A: Oven-baking pottery is one alternative to using a kiln for glazing. By following the necessary steps and precautions, successful oven-baked pottery glazing can be achieved.
Q: Are there kiln-free pottery glazing techniques?
A: Yes, there are kiln-free pottery glazing techniques that do not require traditional firing methods. Raku firing and pit firing are examples of alternative methods that can create unique glaze effects.
Q: What materials and tools do I need for no-kiln pottery glazing?
A: When glazing pottery without a kiln, there are alternative pottery glaze options to consider. It is important to have the necessary materials and tools to achieve desired results.
Q: Can you provide a step-by-step guide on glazing pottery without a kiln?
A: Certainly! In the step-by-step guide, we will cover the entire process of glazing pottery without a kiln, from preparing the pottery for glaze application to the final finishing touches.
Q: What tips and tricks can you share for successful kiln-free pottery glazing?
A: To ensure successful kiln-free pottery glazing, we have valuable tips and tricks to share. These insights will help troubleshoot common issues and achieve professional-looking results.