Glazing pottery adds a unique touch of beauty and functionality to ceramic pieces. It’s a simple yet effective process that allows you to customize your creations and give them a personalized touch. Learning how to glaze pottery at home is easy and cost-effective, making it the perfect hobby for anyone who loves to create. In this article, we’ll take you through the steps necessary to glaze your pottery pieces at home, highlighting the essential supplies and techniques required for a professional-looking finish.
Key Takeaways
- Glazing pottery is a simple yet effective process that enhances the beauty and functionality of ceramic pieces.
- Learning how to glaze pottery at home is cost-effective and allows you to customize your creations.
- The essential supplies for pottery glazing include brushes, glazes, kiln, and safety equipment.
- Preparing your pottery pieces before glazing is crucial, including cleaning, drying, and applying base coats if desired.
- A step-by-step guide can help you achieve professional-looking results, including choosing the right pottery glaze recipes, applying glazes, layering techniques, and troubleshooting common issues.
- Firing and finishing your pottery is the final stage and requires attention to detail, different firing methods, kiln temperatures, and safety precautions.
Getting Started: Pottery Glazing Supplies and Preparation
Before starting your DIY pottery glazing project, it’s essential to gather all the necessary pottery glazing supplies to ensure a successful outcome. Below is a list of the most essential supplies needed:
| Supplies | Description |
|---|---|
| Pottery Brushes | Choose brushes of different sizes and shapes for greater versatility |
| Pottery Glazes | Choose colors that suit your preference, and make sure to select lead-free glazes for food safety. |
| Kiln | A kiln is necessary for firing your pottery. Consider renting one or investing in a small one for your home. |
| Safety Equipment | It is important to use protective gear such as gloves, goggles, and masks to avoid exposure to toxic materials and fumes. |
Once you have the necessary supplies, it’s time to prepare your pottery. Make sure to clean your pieces thoroughly, removing any dirt or dust. Additionally, if you want your glazes to adhere to your pottery better, apply a base coat. This involves applying a thin layer of liquid clay to your pottery and allowing it to dry before applying the glaze.
Preparing your pottery is an essential step in the pottery glazing process. Take your time to ensure that your pieces are clean and ready for the glaze application. With the right supplies and preparation, you’ll soon be on your way to creating beautiful, unique pottery pieces.
Step-by-Step Guide: Glazing Pottery at Home
Glazing pottery is an exciting and rewarding process that can bring your creations to life. Follow these steps to achieve beautiful glazed pottery at home:
Step 1: Choose Your Pottery Glaze Recipes
There are numerous pottery glaze recipes to choose from, each with unique colors and characteristics. When selecting glaze recipes, consider the desired functionality and aesthetic of your pottery piece. It’s also essential to consider the firing temperature and compatibility of your chosen glaze with your clay body.
Step 2: Prepare Your Pottery Piece
Before glazing your pottery, ensure it is clean and dry. If you wish to apply a base coat, do so before applying your glazes. Applying a white underglaze can enhance the vibrancy of your colors and create a more even surface for your glazes to adhere to.
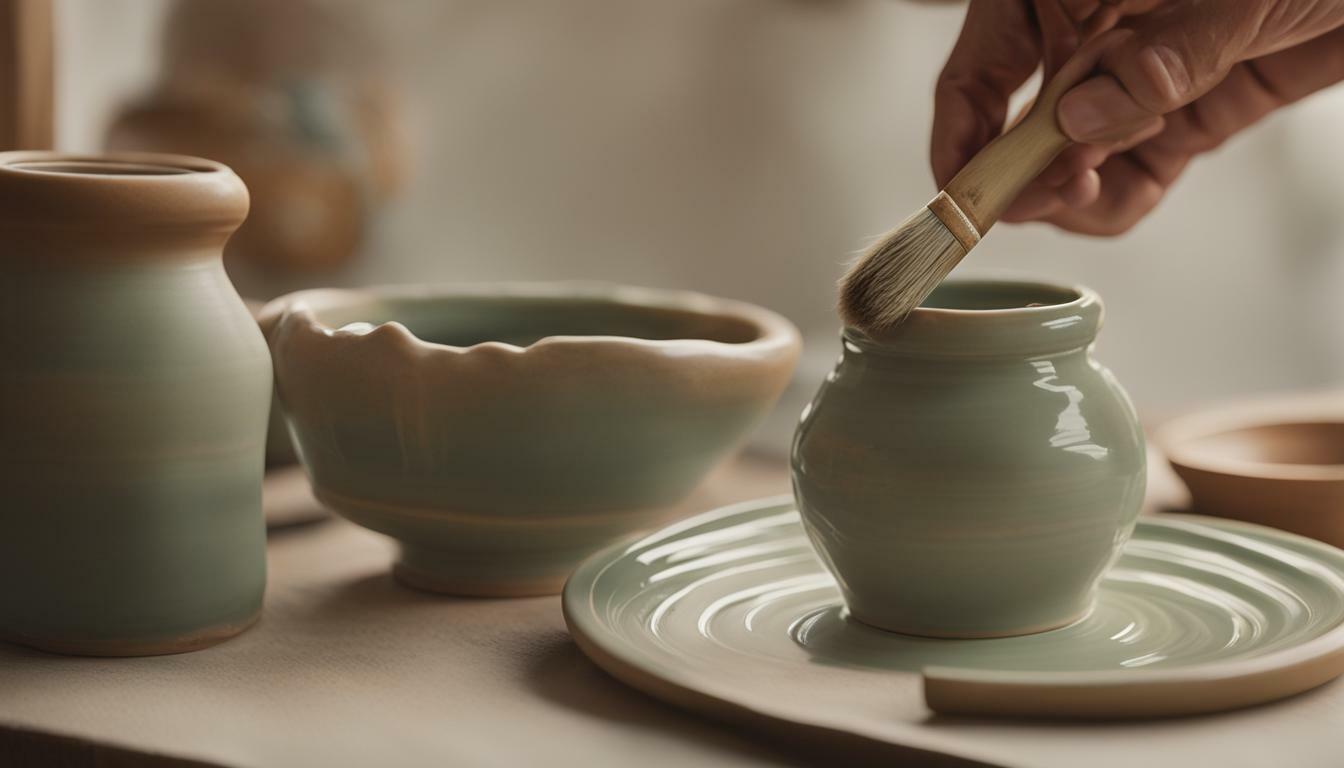
Step 3: Apply Your Glazes
Use a brush or sponge to apply your glaze to your pottery piece in thin, even coats. Be careful not to apply too thickly, as this can cause your glaze to crack or bubble during firing. To create unique effects, layer different glazes or use wax resist techniques to create patterns.
Step 4: Dry and Clean Your Pottery Piece
After applying your glazes, allow your pottery piece to dry completely before firing. Once dry, use a damp sponge or sandpaper to clean up any drips or excess glaze.
Step 5: Fire Your Glazed Pottery
Follow the firing instructions for your chosen glaze recipe and clay body. Firing your pottery piece is essential for melting the glaze and creating a durable, water-resistant finish. Be sure to wear appropriate safety gear, such as gloves and a respirator, when firing your pottery.
With these step-by-step instructions and home pottery glazing tips, you can successfully create beautiful glazed pottery. Take the time to experiment with different glaze recipes and techniques to create unique and stunning pieces that showcase your creativity and style.
Learn How to Glaze Pottery Without a Kiln – Easy Steps Guide
Firing and Finishing: Bringing Your Glazed Pottery to Life
After completing the glazing process, the final stages of firing and finishing are crucial for bringing your pottery to life. Firing pottery at the right temperature ensures that the glazes fuse with the clay, resulting in durable and permanent creations. Here’s what you need to know about the pottery glazing process at home.
Firing Pottery
There are two primary methods for firing pottery: electric kilns and gas kilns. Electric kilns are best suited for beginners and are more cost-effective. They are easy to operate and allow for precise temperature control. Gas kilns, on the other hand, are more expensive to operate and require more expertise. They also produce unique effects, such as carbon trapping and reduction firing.
When firing pottery, it is essential to follow specific kiln temperature guidelines for the best results. Generally, a bisque firing is done at a lower temperature before the glaze firing, which is done at a higher temperature to melt the glaze and bond it to the clay. The firing time and temperature depend on the type of glaze used, the size and thickness of the piece, and the specific kiln used.
Finishing Techniques
Once the pottery has been fired, there are several finishing techniques to consider to enhance its appearance and durability. Sanding and polishing the surface can create a smooth and shiny finish. Adding decorative touches, such as carving or painting, can also make your pottery stand out.
Choosing the best glaze for pottery at home can also affect the final appearance and functionality of the piece. Some popular glazes for pottery include clear, matte, and glossy finishes. Clear glazes are ideal for showcasing the clay’s natural color, while matte glazes provide a more subtle finish. Glossy glazes are highly reflective and create a bright and vibrant appearance.
It is important to note that the best glaze for pottery at home depends on personal preference and the specific project. It may take some experimentation and testing to find the perfect glaze for your piece.
Overall, the firing and finishing process are crucial for bringing your glazed pottery to life. Taking the time to follow proper firing guidelines and finishing techniques can significantly enhance the beauty and durability of your creations.
Conclusion
In conclusion, glazing pottery at home is a fun and rewarding activity that anyone can learn. By following the simple steps outlined in this article, you can create beautiful and functional ceramic pieces that showcase your style and creativity. Pottery glazing at home also offers many benefits, including cost-effectiveness and the ability to customize your creations.
As you continue to practice and perfect your pottery glazing skills, there are many resources available to you. Consider joining online pottery communities, attending local workshops, or investing in more advanced pottery glazing equipment. With dedication and persistence, you can master the art of glazing pottery and create unique and meaningful pieces that will last a lifetime.
FAQ
Q: What is glazing in pottery?
A: Glazing refers to the process of applying a glass-like coating to pottery before firing it in a kiln. This coating adds color, shine, and durability to the ceramic piece, making it more aesthetically pleasing and functional.
Q: Why is glazing important in pottery?
A: Glazing is important in pottery because it not only enhances the appearance of the ceramic piece but also provides a protective layer that makes it more resistant to moisture, wear, and chemicals. Glazes can also add unique textures and effects to the finished pottery.
Q: Can I glaze pottery at home?
A: Yes, you can glaze pottery at home. With the right supplies, techniques, and safety precautions, achieving professional-looking results is possible in a home pottery studio.
Q: What are the benefits of glazing pottery at home?
A: Glazing pottery at home offers several benefits. Firstly, it can be a cost-effective way to indulge in the art of pottery, as you don’t have to rely on professional studios. Secondly, it allows you to have full control over the glazing process, enabling you to customize your creations according to your preferences. Lastly, glazing pottery at home gives you the freedom to experiment with various techniques and develop your own unique style.
Q: What supplies do I need for pottery glazing at home?
A: To glaze pottery at home, you will need essential supplies such as brushes, glazes, a kiln, safety equipment (like gloves and goggles), and cleaning materials. It’s important to choose high-quality pottery glazes that are compatible with your clay and firing temperature.
Q: How do I prepare my pottery pieces for glazing?
A: Before glazing, make sure your pottery pieces are clean and dry. Remove any dust or residue from the surface. If desired, apply a base coat of glaze before applying the final glaze layers to achieve different effects or enhance the color vibrancy.
Q: Can you provide a step-by-step guide on glazing pottery at home?
A: Certainly! Here’s a step-by-step guide to glazing pottery at home:
1. Prepare your pottery pieces by cleaning and drying them thoroughly.
2. Select the desired glaze and mix it according to the manufacturer’s instructions.
3. Apply the first layer of glaze using a brush, sponge, or dipping technique.
4. Allow the first layer to dry completely before applying additional layers or different glaze colors.
5. Experiment with layering techniques, such as brushing on different glazes or using wax resist for unique effects.
6. Pay attention to any specific firing requirements for the glazes you’re using.
7. Once you’ve finished applying the glazes, let the pottery pieces dry completely before firing them in a kiln.
8. Follow the recommended firing temperature and time for the specific glazes you’ve used.
9. After the firing process, allow the pottery to cool before handling or further finishing.
Q: How can I achieve professional-looking results when glazing pottery at home?
A: Achieving professional-looking results requires practice and attention to detail. Here are some tips to help you excel in glazing pottery at home:
– Experiment with different glaze combinations, layering techniques, and surface decorations to develop your own style.
– Keep a record of the glaze recipes and techniques you use to reproduce successful results.
– Take your time and pay attention to the thickness and evenness of the glaze application.
– Practice good kiln firing practices, including understanding the appropriate temperature and firing cycles for your glazes.
– Learn from experienced potters, attend workshops, or join pottery communities to gain insights and feedback.
– Embrace imperfections as part of the artistic process and learn from any mistakes you make along the way.
Q: What is the firing and finishing process for glazed pottery at home?
A: After glazing your pottery, it needs to be fired in a kiln to achieve durability and permanence. Follow the recommended firing temperature and time for the specific glazes you’ve used. Once the firing process is completed, allow the pottery to cool before handling it. Finishing techniques, such as sanding, polishing, and adding decorative touches, can be applied to further enhance the appearance of the glazed pottery.
Q: Are there different firing methods for pottery glazing at home?
A: Yes, there are different firing methods for pottery glazing at home. The most common method is electric kiln firing, which provides precise temperature control. However, alternative methods like pit firing or using a gas kiln can also be explored if you have the necessary equipment and expertise.